
Budget-friendly bathroom makeover: Part 1
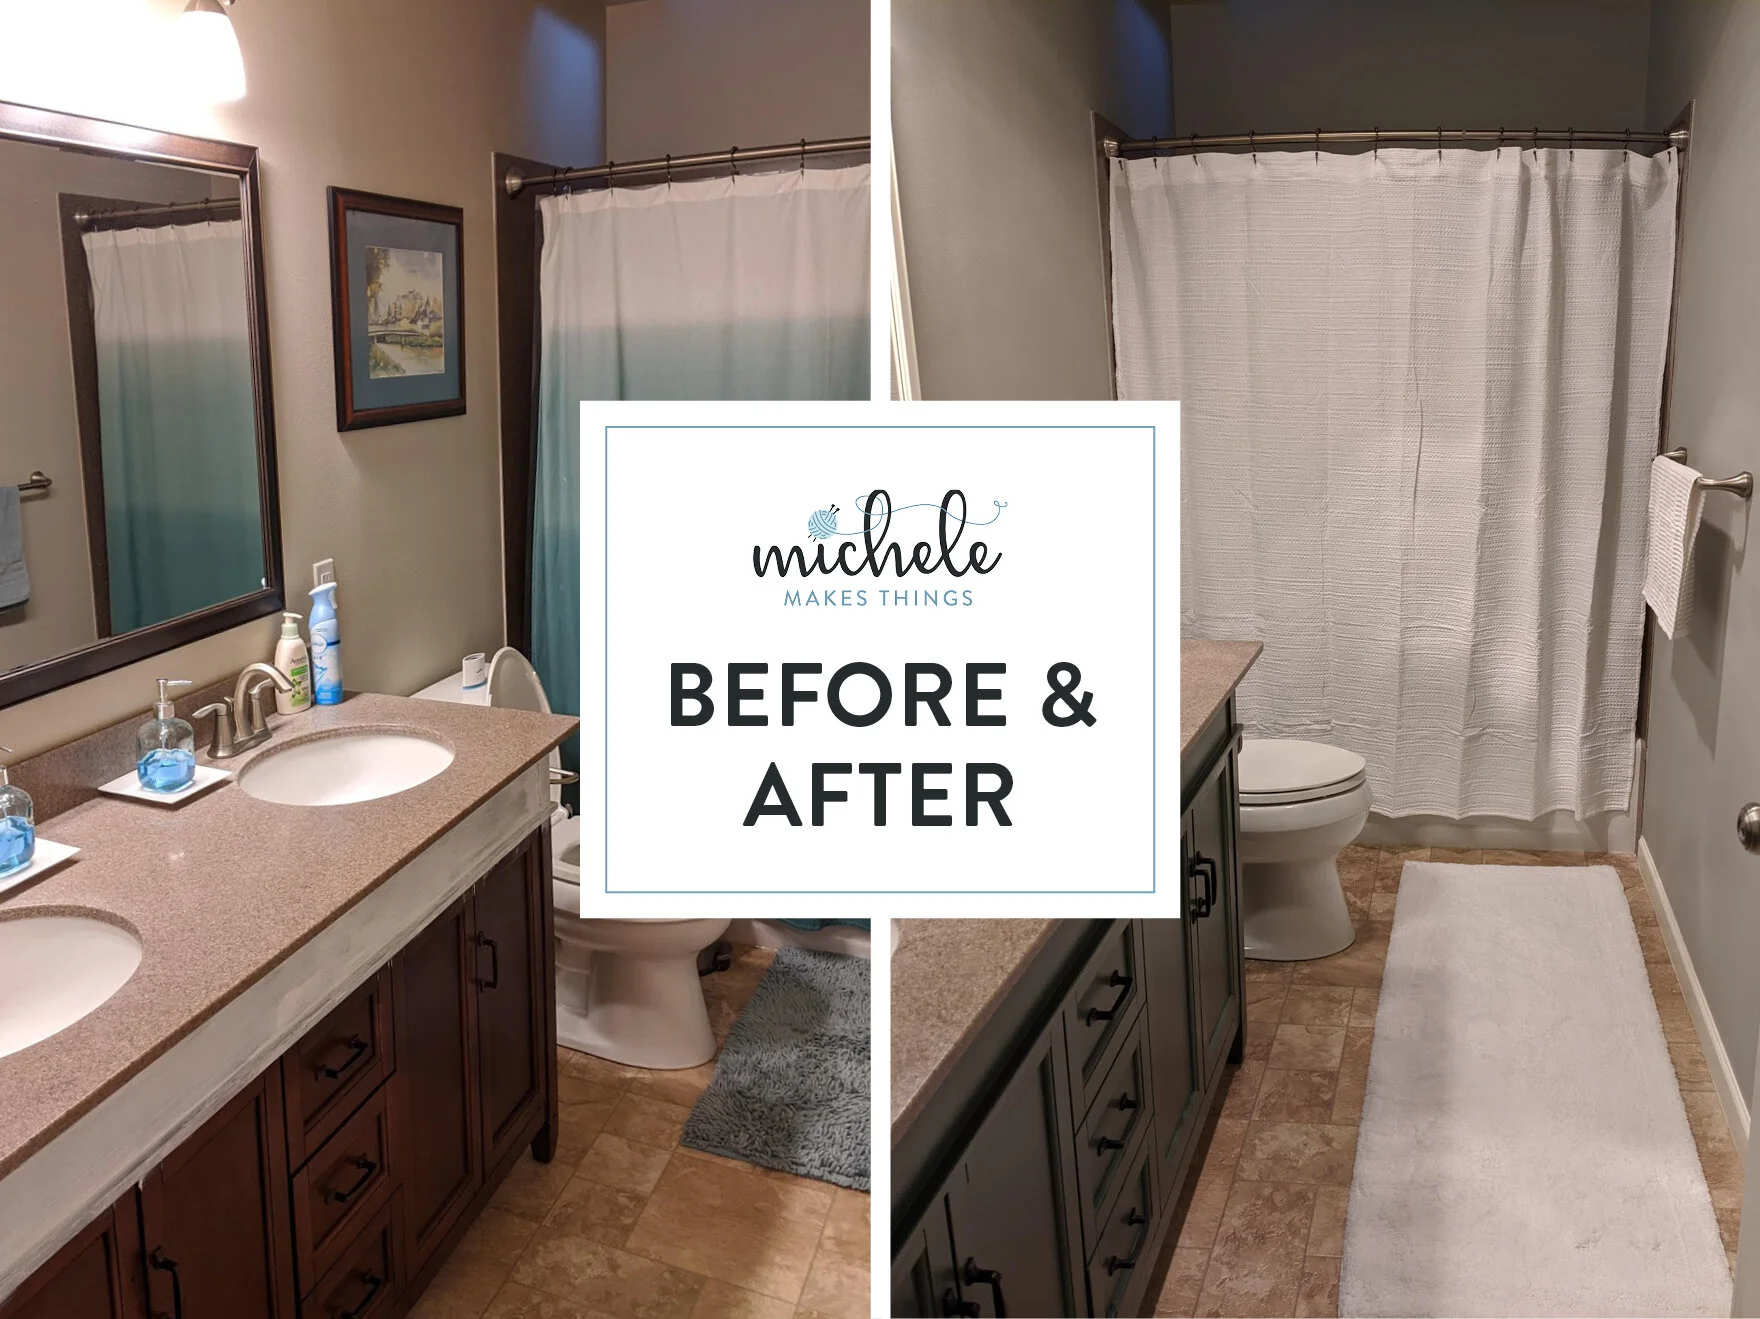
The guest bathroom — you see it, use it, then forget about it. It’s somehow both the most-used room in your house and yet the lowest on the remodel priority list. For us, the guest bathroom is also on the main floor which means it gets heavy use. It was also the only bathroom in our house that wasn’t previously remodeled, and still had all that late 80’s/early 90’s beige builder-grade charm.
Since we moved into our house 2 years ago, my husband and I have made extensive lists of plans of room remodels, and have started to go through room-by-room and make improvements. Somehow, this bathroom always got cut from the list. We kept coming up with excuses, “It’s fine, it’s a bathroom and it serves its purpose. It’s not terrible…” we’d say. Then winter hit and I was inside more, and I just couldn’t deal with another day of staring at 15 shades of brown.
The plan
I knew I needed to really sell this. The bathroom remodel was still the lowest of low on the priority list, but I needed a change. I knew the quickest (and cheapest) way to spruce it up would be some new paint and decor. All the current decor & accessories had traveled with us from apartment to apartment, move after move. These were the last of the traveling items that had no home and found their way into our forgotten “other” bathroom.


With that, I knew I needed to start with a color scheme and then build out a plan & budget. The color scheme, of course, is partially determined by the things that realistically can’t change. For us, that meant it still needed to work with a little bit of brown. Keeping this budget-friendly meant that there was absolutely no logical reason for us to tear out the current vanity with it’s flecked brown granite top (which happens to also match the flecked brown built-in shower). While not my first choice, I could make it work to my advantage.
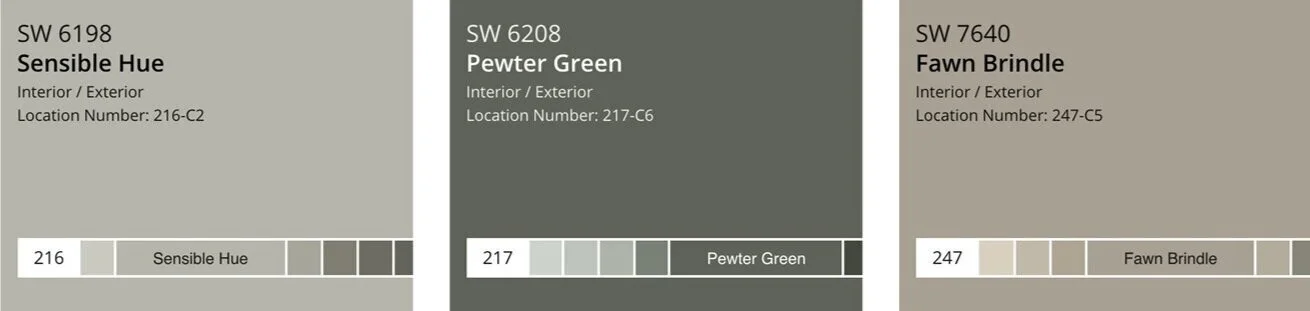
I decided to go with earthy tones in the green family, with hints of fawn/mushroom (I refuse to say beige). This would allow for that vanity countertop to serve as more of an accent than a dominant color throughout. My go-to paint store is Sherwin Williams; I feel like the paints are better quality, plus I have one down the street which helps in a pinch! (Not an ad, I just really like their paints).
Getting started
With the color scheme picked out and paints purchased, I started by priming all the accessories I was repurposing. Luckily, the bathroom mirror and vanity were both in perfect shape, just way way too dark. I used 2 coats of SW Multi-purpose primer for both of these items (you can see a little bit of it in the before photos that I almost forgot to take!). If you’re repainting a vanity, make sure to remove all doors, drawers, and hardware (photo was snapped right before I did just that). Make sure to also user painter’s tape to keep edges clean — I prefer Frog Tape as it holds better; I’ve had many a messy edge from the traditional blue tape.

Don’t forget the primer
1-2 coats of primer will lead to a smoother finish and extend the life of your paint!
After priming, I painted the vanity in SW Pewter Green. I wanted this vanity to be an eye-catching color that would compliment the granite but also set the overall tone and mood for this bathroom. I wanted something light and airy that would still work with the brown tones, so my inspiration was an earthy spa retreat. I kept the original black hardware, which I felt gave it a modern feel with the offset of the brushed metal faucets.
Once the paint dried on the vanity, I used 2 coats of Minwax Polycrylic in Satin to seal it. Note: make sure you stir this continuously while using, otherwise it will dry glossy!
I painted the bathroom walls in SW Sensible Hue. I felt this was a nice neutral while still pulling in a little bit of those earthy green tones. I painted the mirror white to match the trim so it would more-or-less blend into the wall instead of weighing it down.
At this point, you can already start to see the transformation, but those accessories have got to go!


Final touches
Using my color scheme, I made a HomeGoods trip to buy new matching accessories: soap dispensers, tissue box, candles, towel set, shower curtain, rug, and even a couple plants. I purposely grabbed items primarily in white & gray with accents in tan/brown (as well as black/rod-iron and brushed silver in keeping with the mixed metals). I also opted against heavy patterns here, I really wanted to keep everything clean and light.

Pairing accessories
I combined all of these items together based on simple color schemes (brushed metal, rod iron, white/gray, tan/brown). While all different, they work well together as accents pieces.


With those minor changes, the bathroom already felt a lot lighter and cleaner. I was already more relaxed the moment I stepped inside. The soothing greens suddenly made the browns feel a lot less… brown. What started as a dominant color became an accent, and made me appreciate it a whole lot more.
To lighten the floors, I got the longest white rug I could find. This made a huge improvement, but I knew this was a temporary solution as I had fully planned to change them up, somehow. Stay tuned for my next post where I’ll add some finishing touches to the overall space and share my step-by-step process on updating the floors. I’ll give you a hint: it involves a little bit of paint, a lot of stenciling, and a whole new understanding of the meaning of patience.
Budget Breakdown
Paint: Sherwin Williams, ~$80 (1 gallon Emerald Satin latex paint in Sensible Hue, 1 quart Emerald Satin latex paint in Pewter Green, price after coupons from mailing list)
Multipurpose Primer: Sherwin Williams, ~$15 (1 quart, I already had this on-hand, which helps save money for future projects like this one!)
Minwax Polycrylic: Sherwin Williams, ~20 (1 quart, I already had this on-hand as well)
Accessories: TJ Maxx HomeGoods, ~$150 (includes soap dispensers, toothbrush holder, tissue box holder, candles, plant, shower curtain, rug, and hand towel set)
TOTAL COST: $265