
Budget-friendly bathroom makeover: Part 2
Time to say goodbye to that builder-grade bathroom floor! If you read my Budget-Friendly Bathroom Makeover: Part 1 post, then you already know that I repainted my bathroom, which included repurposing the existing wall mirror and vanity. After also upgrading the accessories, the only thing left to do was to tackle the floor. For additional information on overall budget plans and color scheme choices, make sure you check out the Part 1 post!
In keeping with the theme here, I really wanted to change out the floors but couldn’t justify the cost of ripping everything out and re-tiling. The floors were perfectly fine, just not my taste. I’d seen expert DIYers all over instagram showing off their beautiful hand-stenciled floors, and it got me thinking. I just needed to make sure it actually made sense for this space and wouldn’t end up on some random post about Pinterest fails for years to come.
The first obstacle: convincing my husband (and myself still, honestly) that hand painting our bathroom floor was a good idea. That meant research. A LOT of research. I checked in on folks who had painted their floors 1+ years previously to see if they were still holding up. By and large they were, with a handful of missteps along they way. It seemed easy enough. Besides, I went to art school guys. If there’s one thing I took away from 4 years of character-building (and often soul-crushing) class critiques it’s to make up your mind, follow through, and ask questions later. Also, fake it till you make it. 🤷🏻♀️
The plan
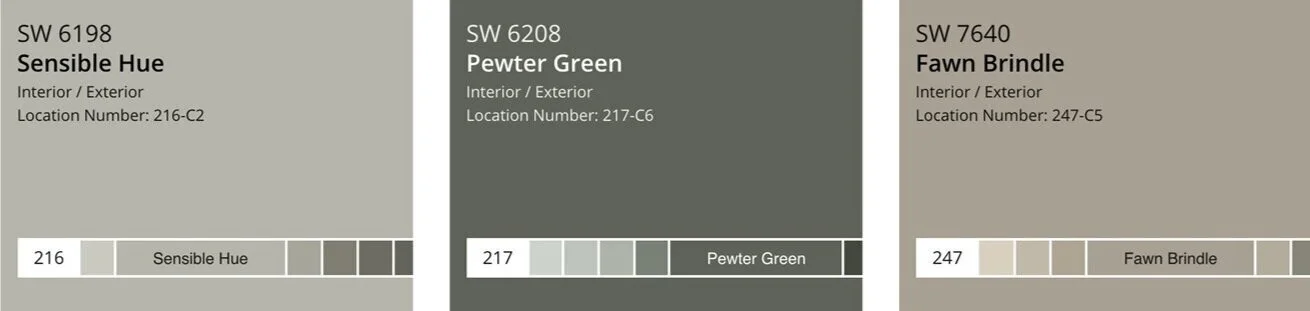
Once I made up my mind that I was actually going to go through with this potentially terrible idea, I compiled a list of what to do and what not to do, and I got started on the planning process. The first step was the color palette, which I’d already figured out: SW Sensible Hue for the walls , SW Pewter Green for the vanity, and SW Fawn Brindle for the floors.
Next up was choosing a tile design. I’d scoured the #stenciledfloor IG posts for days compiling my favorites, and I ended up loving the Maestro Tile Stencil from Cutting Edge Stencils. It has a beautiful geometric shape that lends itself nicely to earth tones. I also liked that the full tile is made up of 4 symmetrical sections, meaning it can give the appearance of 4 tiles coming together to make 1 large tile. This was important for me since my original floor is not all one size tile. The largest squares on my floor were 12x12, and the smaller ones were 6x12 and 6x6. I chose the 12x12 stencil so that it would fit perfectly on the large tiles, but split up evenly on the smaller ones (so no grout lines would look too out of place).
Note: I ordered 2 of the same stencil so that I could cut one up to fit the awkward areas and edges. I also purchased their Stencil Essentials kit which included a stencil brush, foam roller, and a level.
While I waited for the tile stencils to come in, I got all my other supplies in order and prepared the floor.

Supplies
Make sure you have everything you need before you get started!
Now here’s my brutally honest step-by-step guide to painting & stenciling floors!
Step 1: Deep clean the floors
A lot of people recommend using heavy chemicals like TSP, but I really didn’t want to use that in the house. It had so many warnings and is actually illegal to buy in some states, plus I have 2 cats who are weirdly obsessed with cleaning products and that was a battle I didn’t want to fight. Fortunately, my floor was already in great shape, so I used a strong all-purpose cleaner and a lot of elbow grease. Make sure to clean those floors several times until they’re so clean you’d be ok eating off of them. You don’t actually have to eat off of them, it’s just good to know you have the option.
Step 2: Apply a Bonding Primer
Once floors are clean and dry, carefully place your painter’s tape in clean lines to protect anything you don’t want painted forever. Try not to get any tape on the floor as you’ll have to touch this up at the end and, let me tell you, you don’t want to have to do that. Next up, grab a foam roller and get that floor primed! You’ll want to use a bonding primer so that the paint will properly adhere. This will also allow you to paint on almost any surface including tile, vinyl, and wood. I used 3 coats of Valspar Bonding Primer/Sealer, allowing to dry for 2 hours in between each coat.
This is a good time to test your stencil with your color choices and paint techniques. I used a pizza box to compare a couple different base coat options (you can see it pictured on the vanity below). I also tested out my tools - stencil brush vs. foam roller.


Step 3: Apply the base coat
Now that the primer is dry, it’s time to add the base coat (using the same foam roller). I decided to use a white that matched the trim & doors, which are all the same throughout our house. While I thought I would use a stark white, it ended up looking really strange in the space. Even now it looks different depending on the lighting, so be prepared to try out a few different white paints before you select the final color. I used 2 coats of SW Classic Light Buff, allowing it to dry for at least 24 hours before stenciling.
Step 4 : Prepare your stencil
Once your floors are dry, you’re ready to stencil — almost. First off, get comfortable with your stencil. I know this sounds weird, but this is precise work and you don’t want to make mistakes at this stage. Make sure you determine what direction you’ll apply your stencil (there is a top/bottom as it aligns to the previous stenciled area). Also figure out where you want to start. I’ll be honest, I moved this around the bathroom for about an hour before I figured out exactly where I wanted it to begin and what lines I would align it to. I measured a lot and determined the edges would only use half the stencil, so I started at the “next” tile position beside it. I also wanted to start in an area where I’d be placing the rug just in case it came out terrible. This is completely subjective, just start where you’re most comfortable.
Once you’ve figured that out, it’s time to spray the back of your stencil with some adhesive. I used Krylon Easy-Tack since it’s easy to reposition and doesn’t leave a lot of residue. Spray this in an open, well-ventilated area (or outside) and allow it to dry for a few minutes before using. That will allow it to be tacky but not overly sticky.
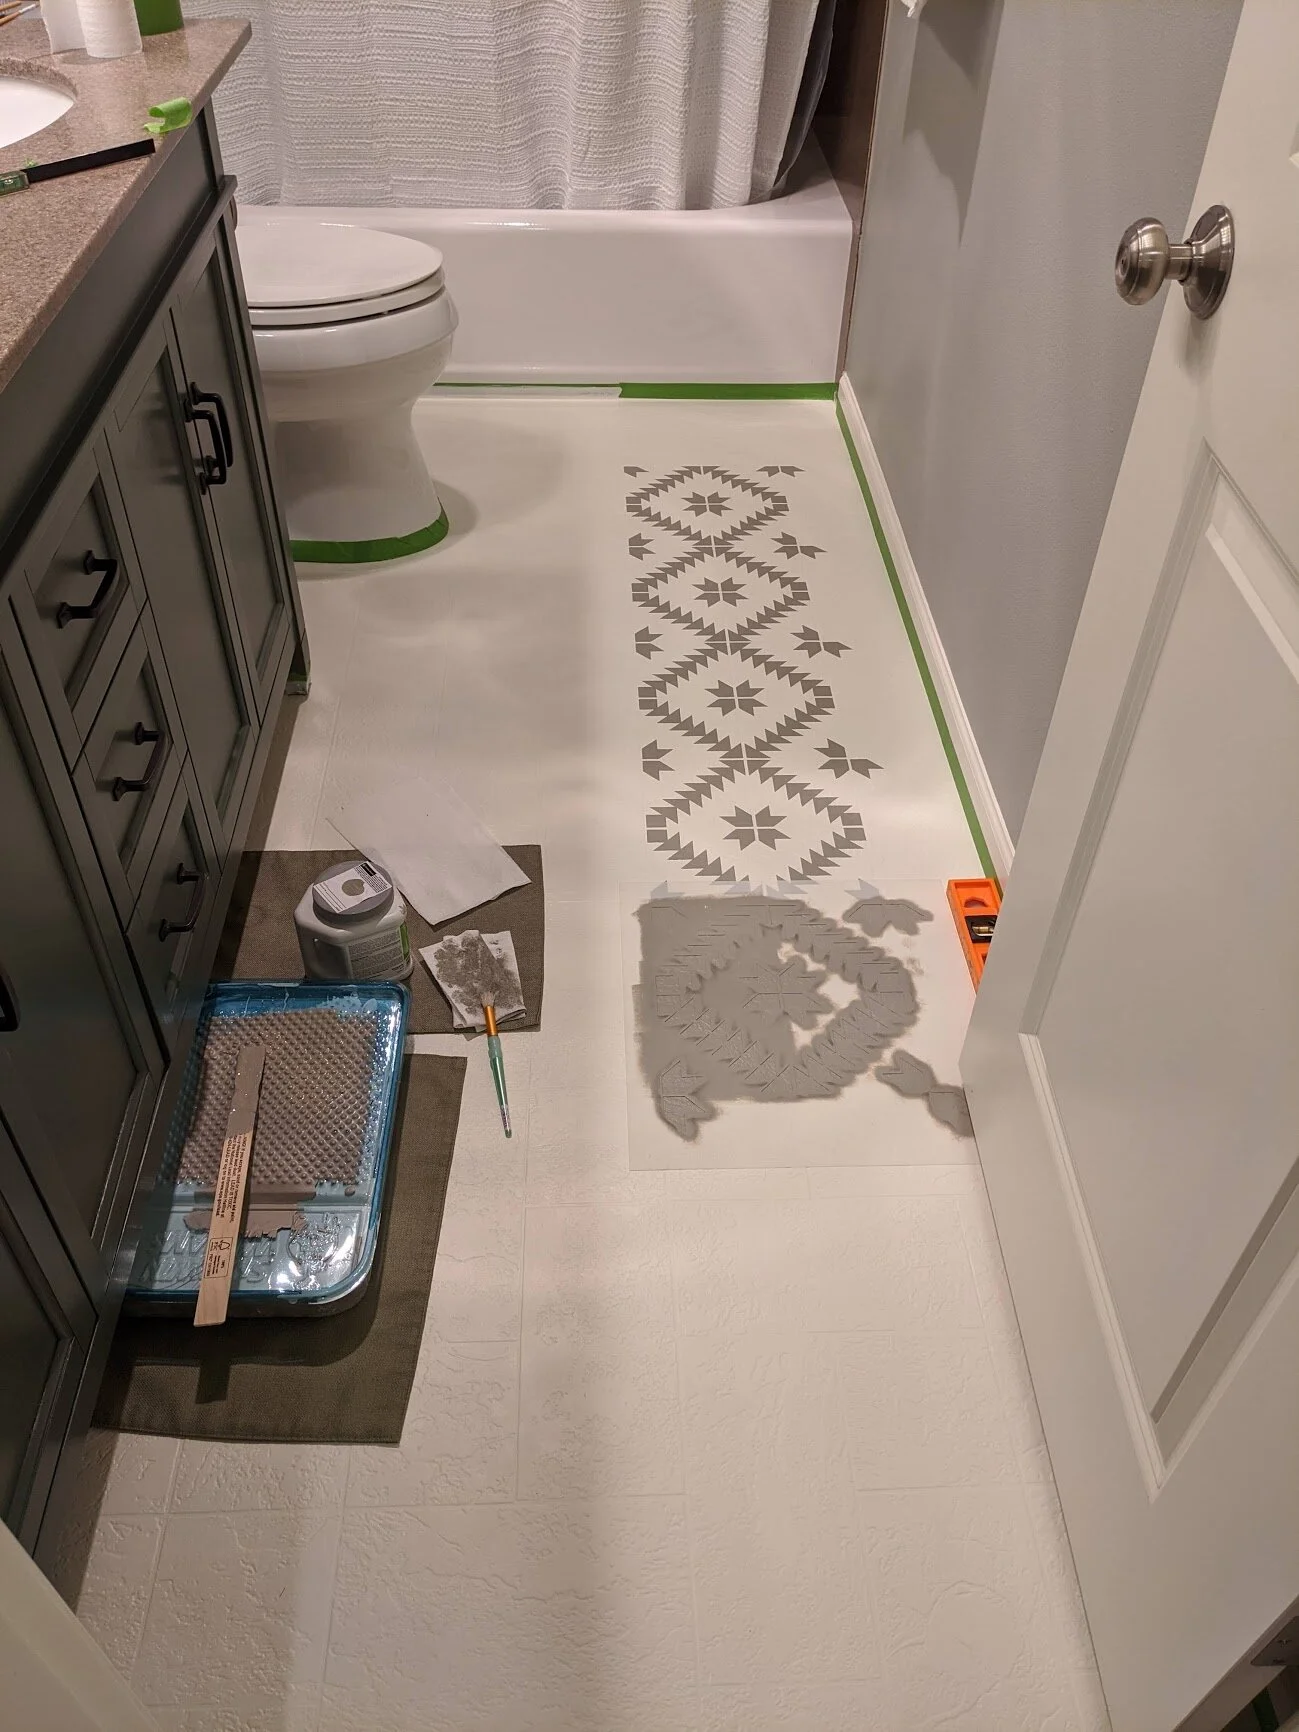
Step 5: Stencil time
Are you excited? It’s go time! Ok so, here’s the truth. This step took me a surprisingly long time. I measured and re-measured and measured again. I had my level and my ruler and had even planned out the next few tiles to make sure it aligned all the way down the floor. But getting that first tile painted was the hardest part of this entire process for me. I completely clammed up, fully realizing what I had gotten myself into and knowing if I messed this up, I’d have to go back to the drawing board on what to do with this damn floor. And with that, I exhaled, moved the stencil around 2-3 more times, went back to the spot I had originally picked, and started painting.

Aligning the stencil
Similar to the rules of sewing, measure twice and paint once. Make sure your stencil is completely aligned before you start painting!
I really wanted to make sure this floor came out as perfect as possible (no pressure or anything), so I went with precision over convenience. My tests between the stencil brush and foam roller showed that, while much more time consuming, the brush made much cleaner lines with less bleed. Now understand that there will be some paint bleed regardless. You’re hand-stenciling a floor which will in no way be perfectly even throughout, so set your expectations accordingly.
Get yourself a couple paper towels or a rag so that you can blot the extra paint off of the brush. You want this brush to be almost dry (same goes for a roller if you choose that instead). I landed somewhere between dabbling and using soft brush strokes, keeping the coat light. I did 3 coats per stencil placement to achieve the color density that I was looking for. Once all coats are dry (this only takes a few minutes since the coats are so light), you can move your stencil to the next spot. Repeat these steps until you’ve painted all the “full tile” areas and need to move to partial tiles.
So this actually takes a really long time. You’re not going to finish this in one day. If you finish this in a weekend, you deserve a medal and also probably need to find a good therapist to process your feelings towards yourself for voluntarily taking on such a detailed project. It gets better. Just remember not to open the wine bottle until you’re done for the day, as alcohol and precision painting really don’t mix.


Note: the stencil instructions recommend cleaning this stencil every 10-15 uses. I didn’t realize this until day two, 18 uses in with caked on dry paint and a second layer of spray adhesive. This took me about 45 minutes to clean while crying as I watched the scrubbed off balls of paint stick to the highly effective adhesive on the back. Don’t be like me.
Existential crisis averted (or maybe not), keep stenciling
Now that you’re ready to move onto the partial tiles, you can cut your second stencil to fit. I started with the larger areas, which just required me to cut the stencil in half. Once I finished all of those, I cut it down to the next smallest size, and so on. Make sure not to cut too much off or you’ll have to manually align some of the shapes (this might be unavoidable around the really awkward bends like the toilet). Also, don’t freak out if the partial edges come out messy. It’s hard to get clean lines when you’re not flush with the floor, just know you can touch those up once they dry.
And you’re done! With the stenciling, anyway…


Step 6: Touch up
Once the stenciling is done, take a minute and let yourself cry some tears of joy. But like, just a minute. Ok, get back to it already.
At this point, you really should be proud of yourself. This is hard work, and I promise you it looks better than you think. The thing about being on your hands and knees with your face inches from the ground for several days is that you now know where every imperfect smudge and line is on that floor. Take this time to figure out what level of imperfection you’re ok with with leaving, and what you really can’t live with. Grab your base coat paint and a small detail paint brush and touch up any rough edges. Honestly, this alone took me another day. My husband would poke his head in and ask why I’m still touching up lines he never even noticed, but I knew they were there. Again, maybe don’t be like me.
Step 7: Seal that floor
You made it. The stenciling is done. What once was a clean, laser-cut piece of magic and opportunity is now a cut up pile of broken shapes that seem to be a metaphor for your current mental state. But it’s ok, you’re almost at the finish line!
Before you seal the floor, make sure you go over it once more to remove any dust, lint, or hair. I kept a fresh Swiffer duster handy at all times to grab any random lint I came across. All at once it just seems to appear at this stage. Everywhere.
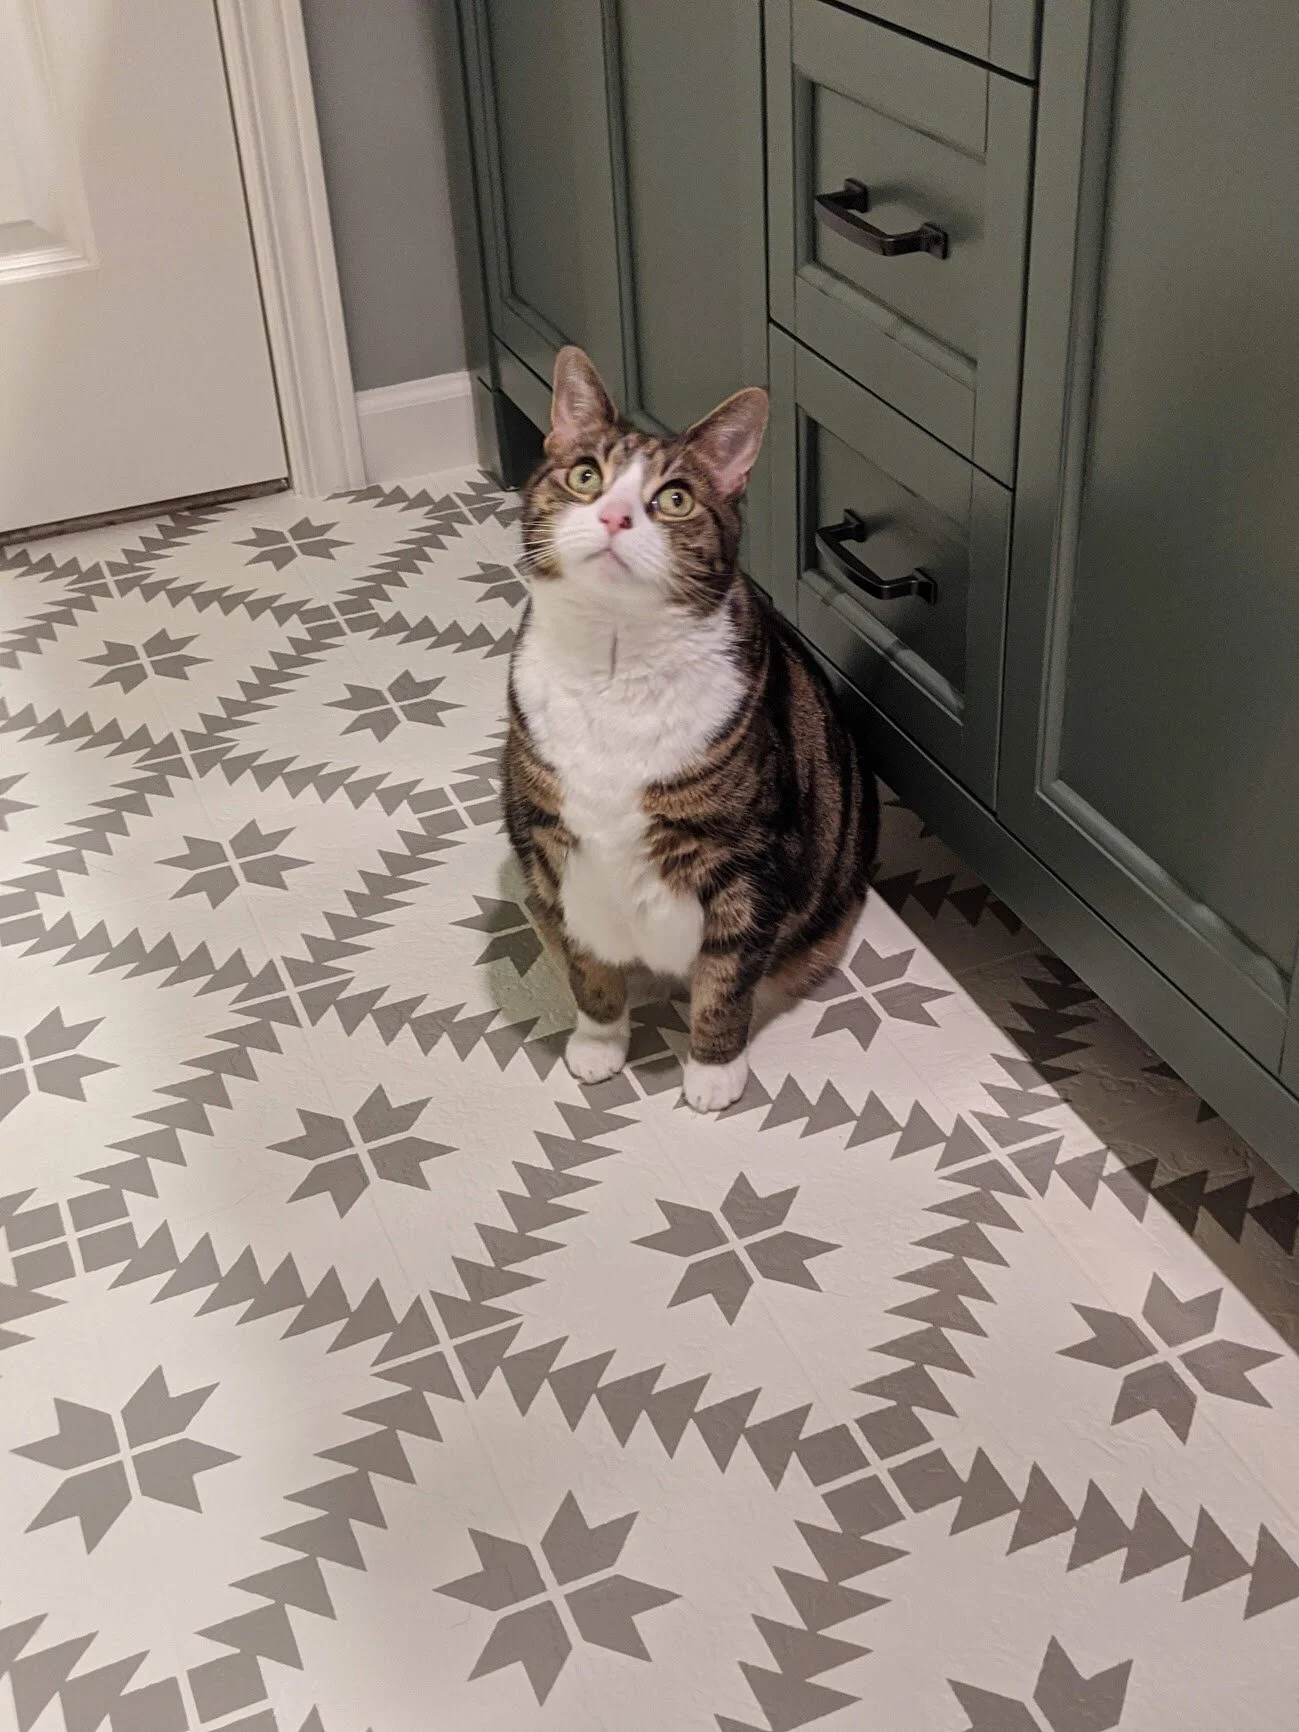
A bit of advice: if you have any highly curious pets, you might want to block off the room for this step. It’s very important that you keep this space hair/fur free before adding the clear sealant. My Swiffer dusting attracted a surprise guest who I then had to relegate to the imaginary room border. She wasn’t thrilled about it.


You’ll want a good water-based polyurethane. Don’t get oil-based, as they can yellow over time. Based on a lot of recommendations I read, I used Varathane Ultimate Polyurethane in Satin. Since this bathroom gets a decent amount of traffic, I made sure to apply 3 coats for maximum protection. You can use your foam roller for this step as well.
A word of warning: as I applied the clear top coat, lint & hair seemed to appear out of nowhere and get stuck on my freshly rolled floor endlessly. At this stage of the process, my patience was at about 2% and this was the real moment I truly questioned if this was all worth it. But after it dried, I couldn’t find any of those pieces of lint. Maybe the fumes got to my head and I imagined all those little buggers, but I suspect it’s another case of overbearing perfectionism and having my face closer to the bathroom floor than anyone ever should.
Step 8: Step back and appreciate what you just did
For real. So retelling this floor stencil adventure gave me low levels of PTSD, but when you’re done and you see the finished product, you won’t even remember how stressed out this little project made you. Once your face is at a normal distance from the bathroom floor, all you see is the beautiful pattern, not all the imperfections or pieces of lint you were obsessively crying over before. Or was that just me?
I don’t know if I’ll ever stencil another floor. Probably not. But I don’t regret stenciling this one. It was a total pain in the ass, admittedly, but I’m pretty proud of how it turned out. After giving it 2 full days to dry, this floor has been in full use every day for a couple months now with absolutely no issues, even with 2 very curious cats.

For the finishing touch, I found a great deal on a set of wall shelves on Amazon that fit perfectly above our toilet. These took about 10 minutes to install and really tied the room together. And just like that, the bathroom is done!
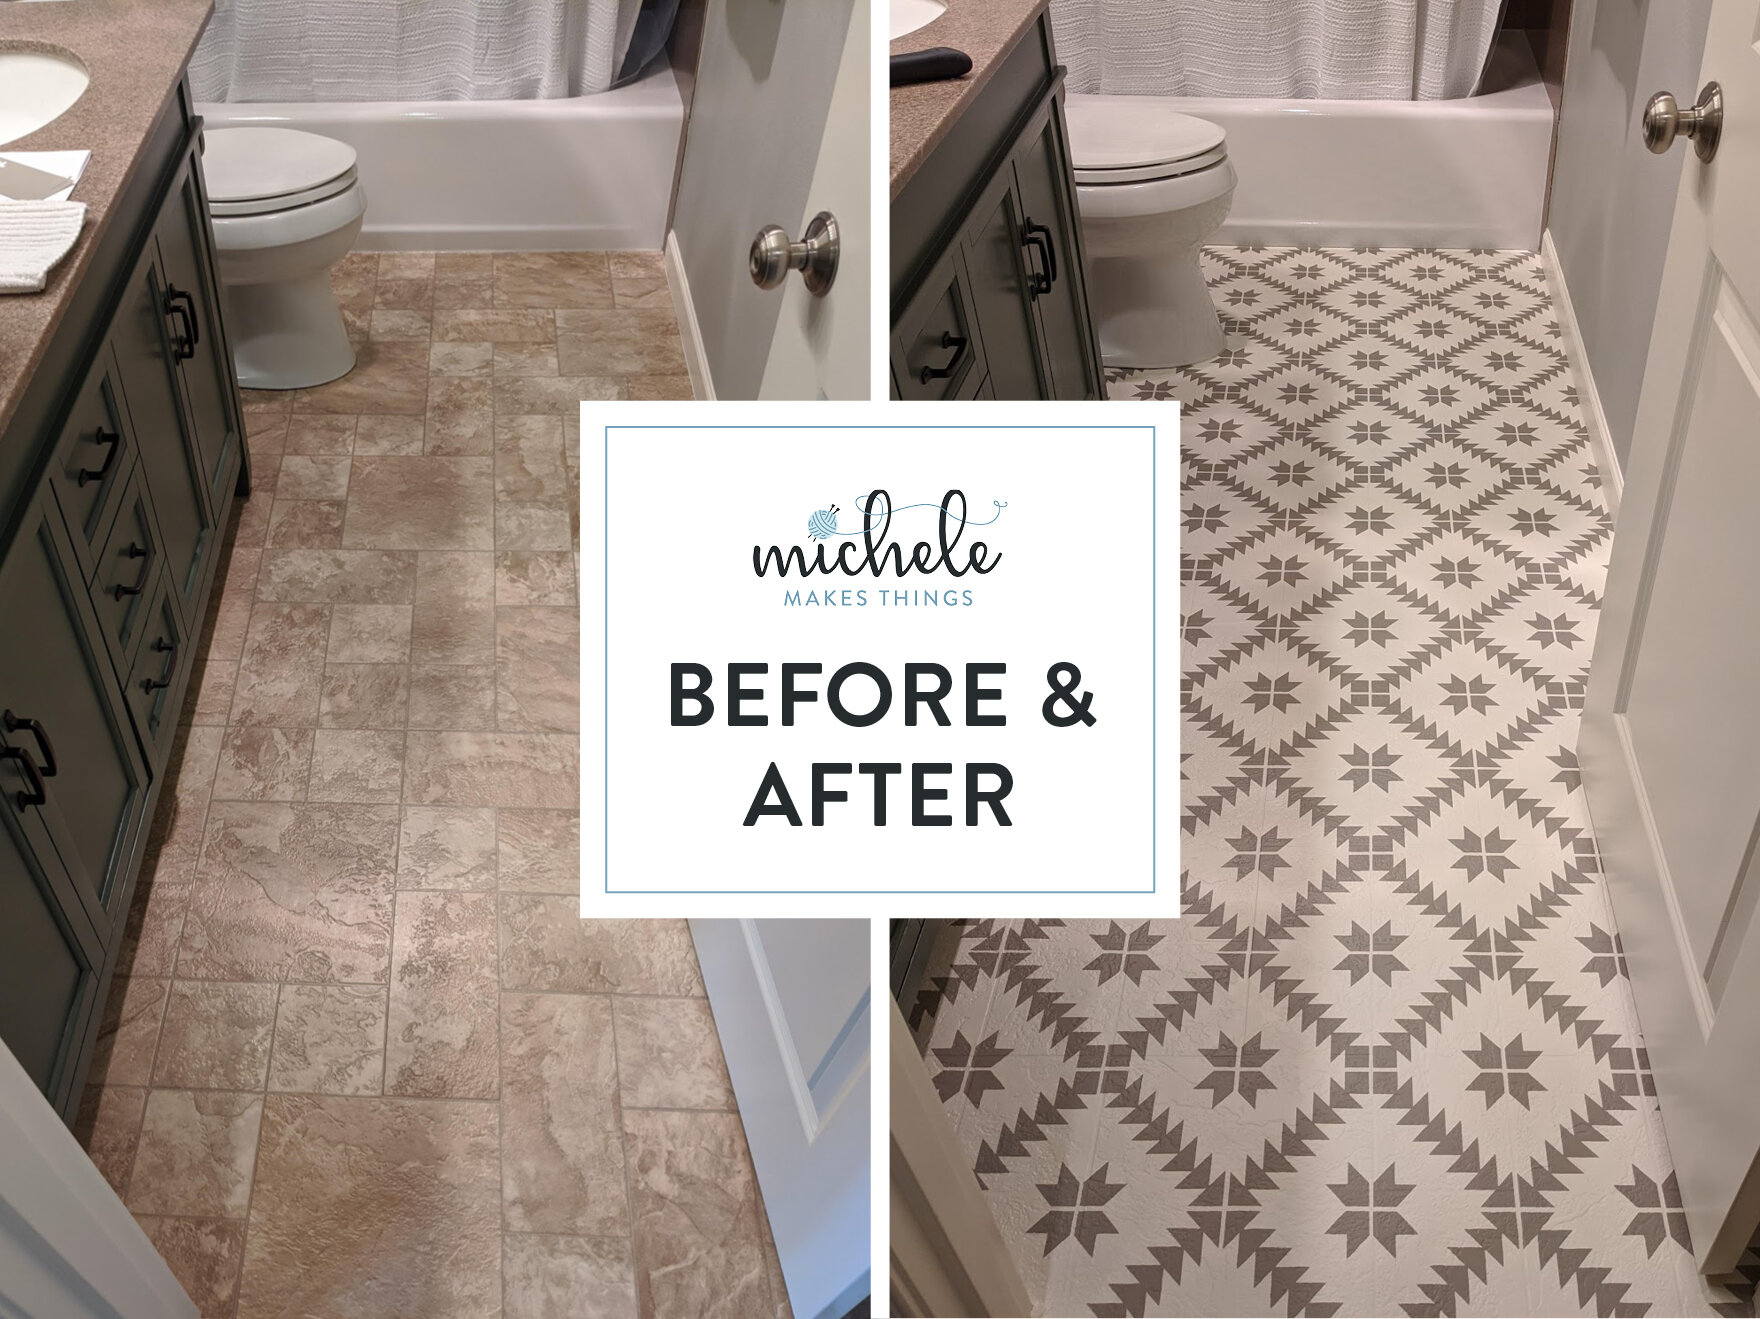
Before and after shots


Budget breakdown
Maestro 12” Tile Stencil: Cutting Edge Stencils, $10 (x2)
Stencil Essentials Kit: Cutting Edge Stencils, $19.50 (included foam roller, stencil brush, & level)
Paint: Sherwin Williams, ~$50 (I already had both of these paints on hand, but a quart each of the base coat and stencil coat should be sufficient)
Simple Green All-Purpose Cleaner: Lowes, $5.99
Valspar Bonding Primer: Lowes, $18.99
Varathane Polyurethane: Amazon, $16.50
Krylon Easy-Tack Repositionable Spray Adhesive: Michaels, $9.50
Floating Wall Shelves: Amazon, $27.99
TOTAL COST: $168.47
(Note: some of the prices above have shifted a bit due to online ordering demand, but these were my costs at the time of purchase)