
Why you should always block your knitting
The moment you’ve been anticipating is here. You’ve spent hours knitting to create this beautiful masterpiece and all you want to do now is wear it and share it. Excitedly, you finish that last bit of bind-off and it’s off the needles. With slightly less enthusiasm, you sew in all those ends. BUT THEN, IT’S DONE. Or is it?
If you’re anything like me, you immediately want to share it with friends and family, parading around the photos of your FO like it’s a new baby (or kitten - no judgement here). So when I completed my Anker’s Summer Shirt and proudly took my first photos, I was quickly deflated when the first response I got was “Oh that’s cute, is it a baby top?”. 😑
Back to reality, I knew I still needed to block it before I was actually finished.
I knitted this top using Lion Brand 24/7 Cotton, which was actually my first time ever knitting with cotton. Side note: I was super impressed with this yarn, especially for the price. The stitch definition is beautiful and the yarn felt sturdy without being too rough. I love it and highly recommend it!
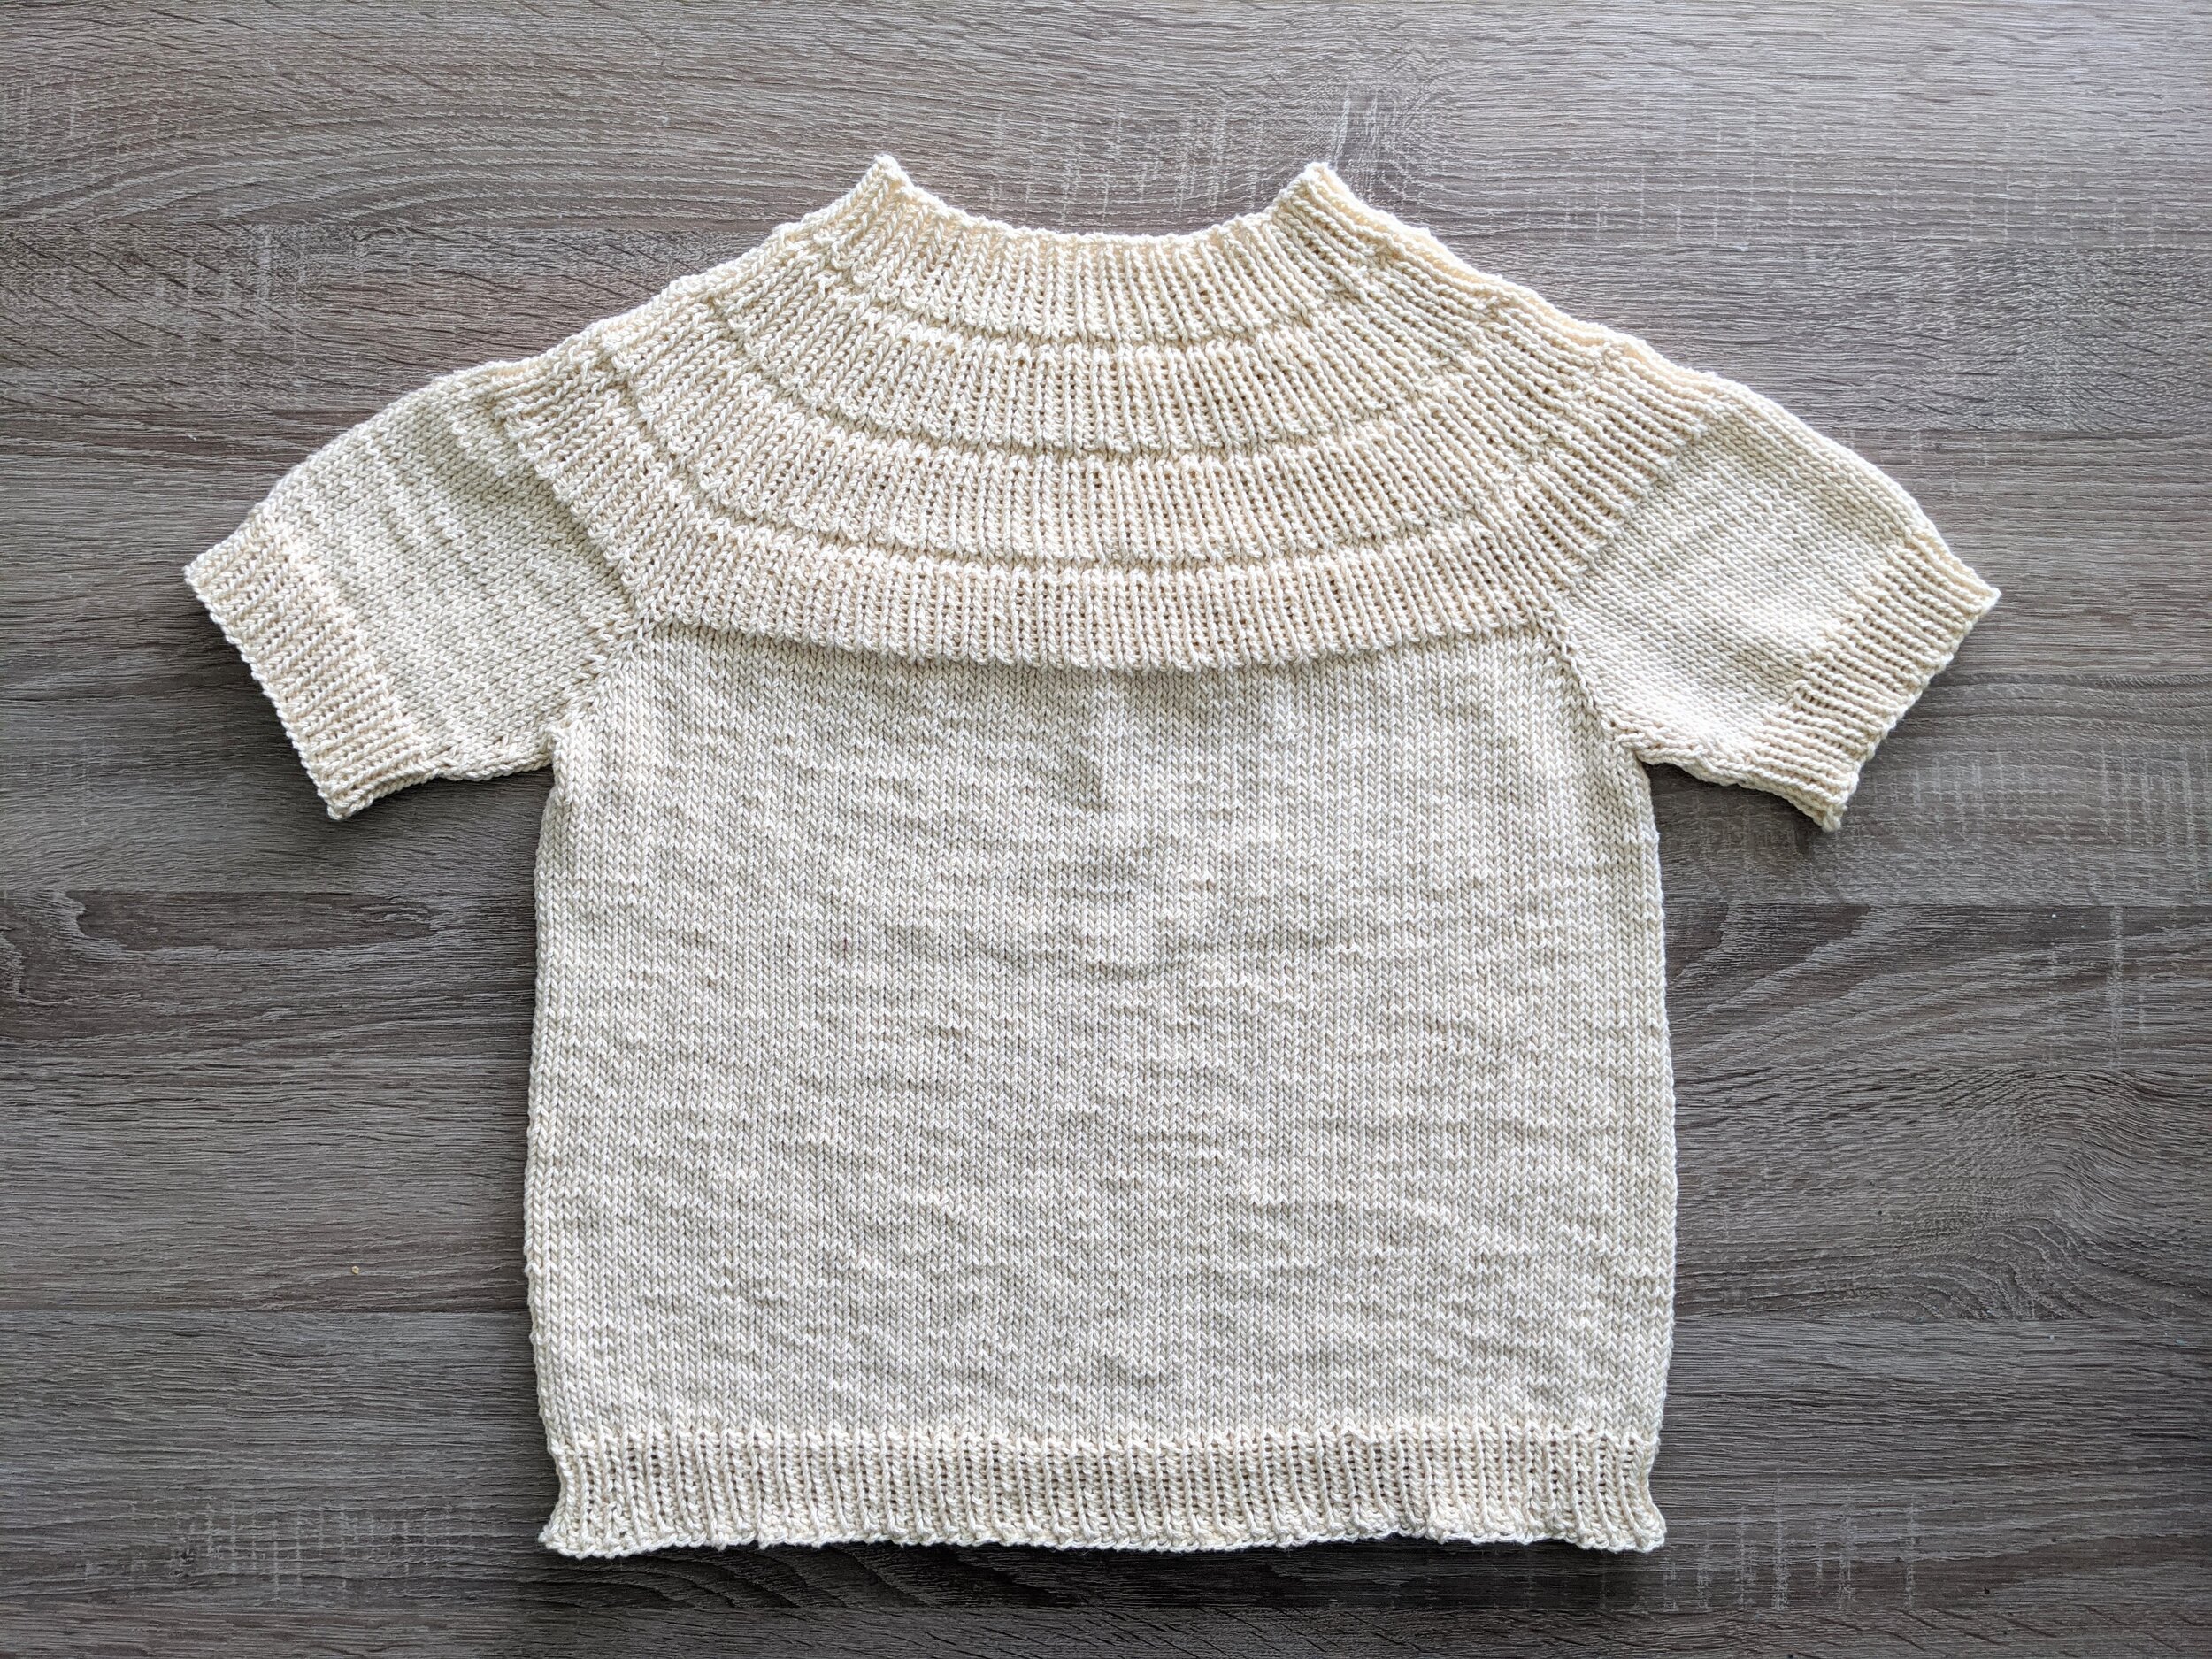
I decided to take a similar approach to blocking like I would with wool, only without the wool wash. You can see in the above photo that everything looks a little tight and I really needed those stitches to relax, so I didn’t think just steam blocking it would do the trick.
I soaked this top (carefully) in a small tub of cold water until it was completely saturated. Once it was finished soaking, I immediately took it out and very carefully wrung out the excess water. The thing about cotton is it really holds onto water, so you need to make sure to get as much out as you can. To help with this, I then placed the top onto a towel and slowly rolled the towel up to help soak up even more of the water. I did this a few times until it felt more damp than soaking wet.
Then comes the fun part - pinning and re-pinning until you get that shape you want. I use interlocking foam tiles I found on Amazon (these are so much cheaper than the ones you find in yarn shops, and they’re exactly the same).

Once I finally got the right shape (it took me a few tries), I left it overnight to dry. Unfortunately, I underestimated just how much cotton holds onto water, and it was still a bit damp. On the plus side, the stitches had already started to relax and hold their shape, so I unpinned it and placed it on a towel - gently placing pressure to get out any excess moisture. I then let this sit for another day.

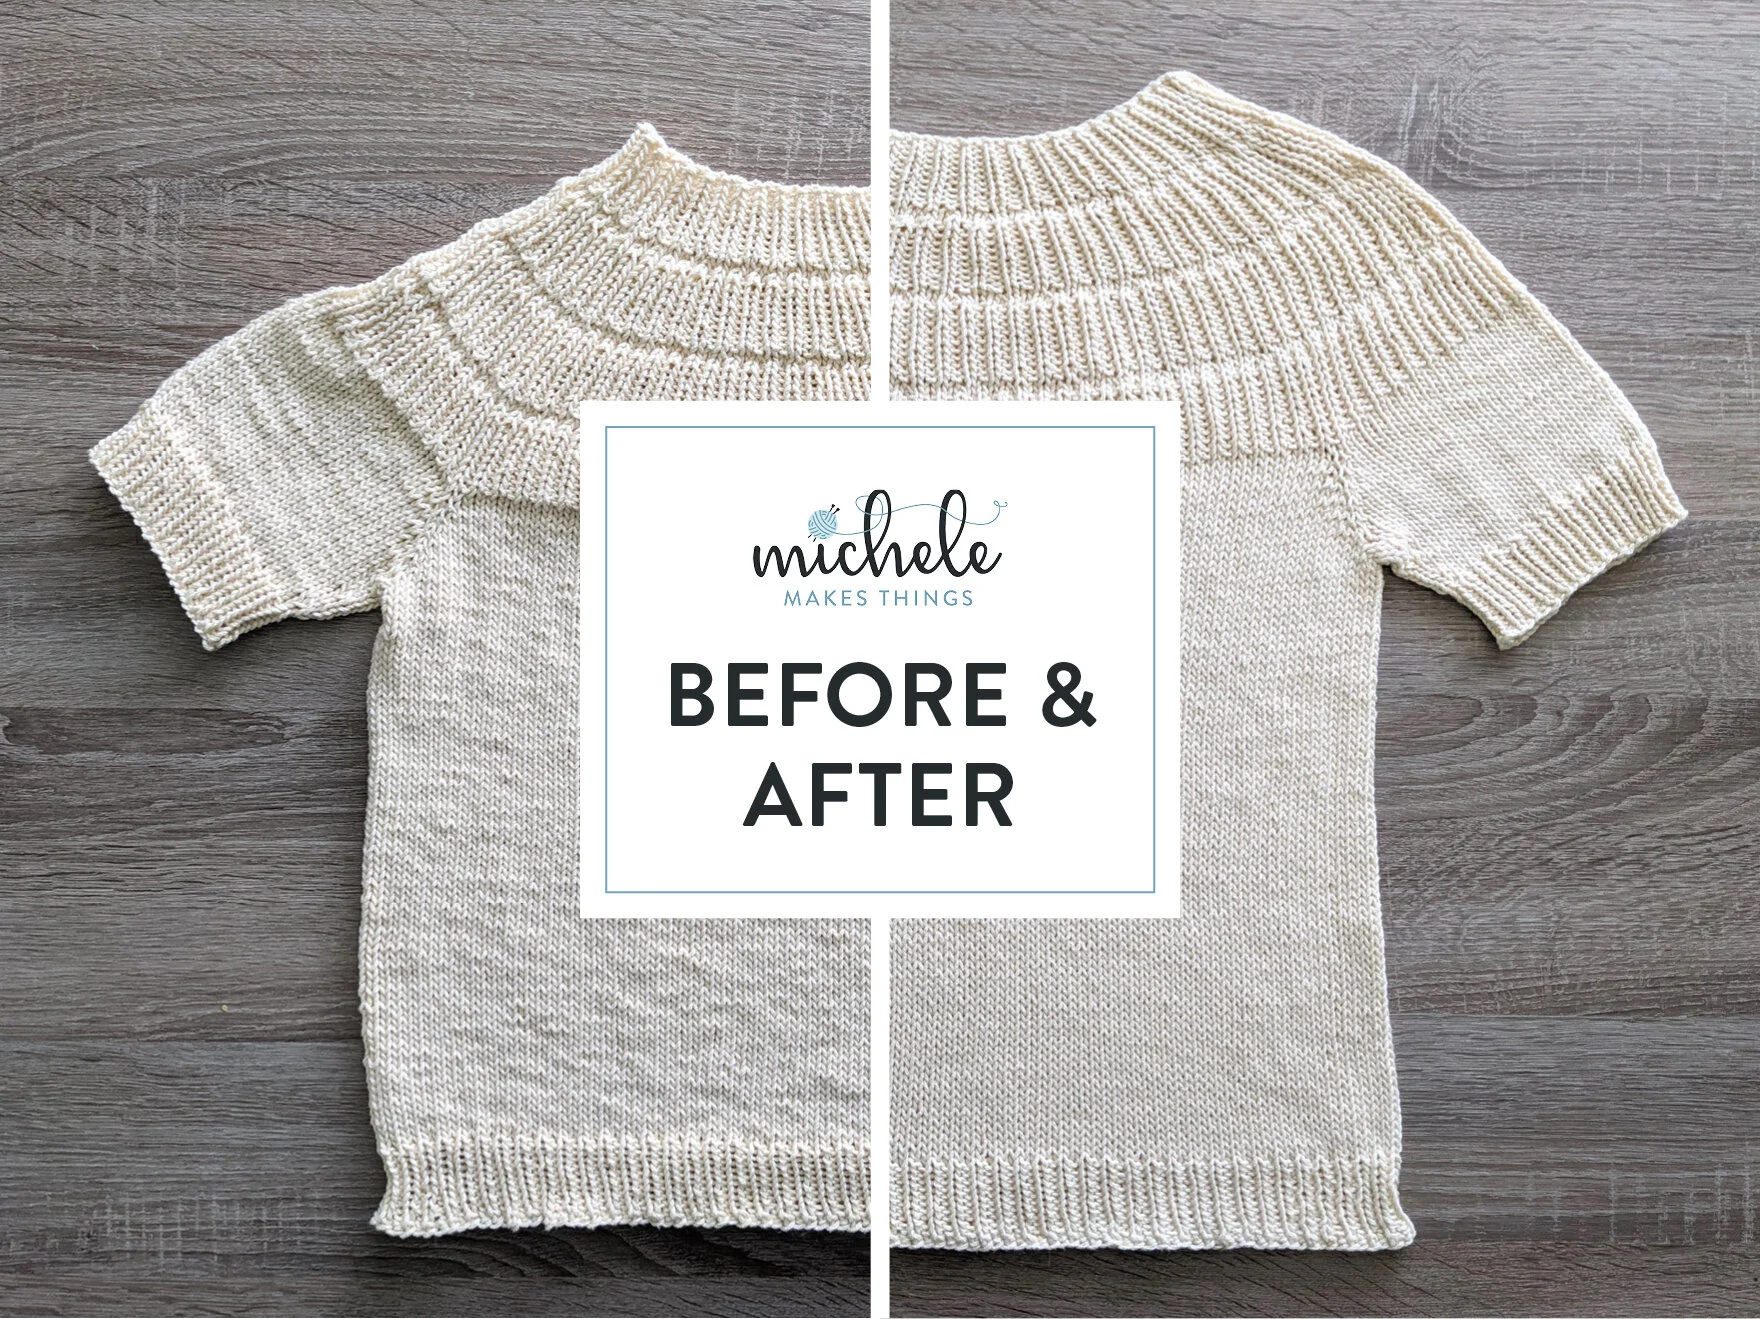
By the next day, this beauty was dry and ready to wear. As you can see, the transformation was remarkable. It’s easy to forget the importance of blocking when you just want to be finished with your project, especially when you see it every day and the tightness of the stitches starts to seem normal. But it’s a disservice to spend so many hours creating something with your hands only to leave it unfinished at the final stage.
The great thing about blocking is that if you’re not happy with the final shape, just re-block it. It might take a couple tries, but you’ll eventually get the shape you want.

The proof is in the pudding. You can really see the stress in every stitch in the before image. The after image shows a relaxed, beautiful top ready to wear!

